Help Request Form
One of the example apps we’ve built to demonstrate the business problems Buttonize can solve is a help request form.
Many companies need this sort of app in order for different departments to make requests to one another. Direct Slack messages work, but oftentimes we want the requests we make to have a paper trail visible to coworkers outside of DMs.
The most common use-case is a request form for your IT Department, and we’ve built an example!
Resulting app
The Example on GitHub
The code for this example can be found in our examples repo. Please check it out and get acquainted.
One import thing to note is that in order to use the local development tooling with Buttonize, you must export your CDK app, as can be seen here.
If you don’t plan to use the local development features, then this step is optional.
HelpRequestFormStack
The first thing we do in our stack is call Buttonize.init, passing in our API key.
This key is needed during deploy time to authenticate your Buttonize app with our service. In addition to authentication, this is how we keep
track of the Buttonize apps you’ve deployed within your organization.
After initializing Buttonize, we instantiate a Buttonize app via new ButtonizeApp(). ButtonizeApp is a CDK construct that will provision
several different AWS resources and act as a container for all the other Buttonize constructs you place within the app.
After that, every Buttonize app needs at least one page. Here’s a high level overview of what the app with all its pages looks like:
new ButtonizeApp(this, 'HelpFormApp') .page('HelpFormPage', { body: [ // ... - omitted for brevity ] }) .page('PreviewPage', { body: [ // ... - omitted for brevity ] }) .page('FinishPage', { body: [ // ... - omitted for brevity ] })Within each page’s body prop, we then layout what our app should look like and which actions certain components should take
when interacted with.
HelpFormPage (the first page)
Our first element is simply for displaying text and giving the user some context as to what they’re looking at. Hence, it’s a
Display component. Notice it takes very few props and is not interactable.
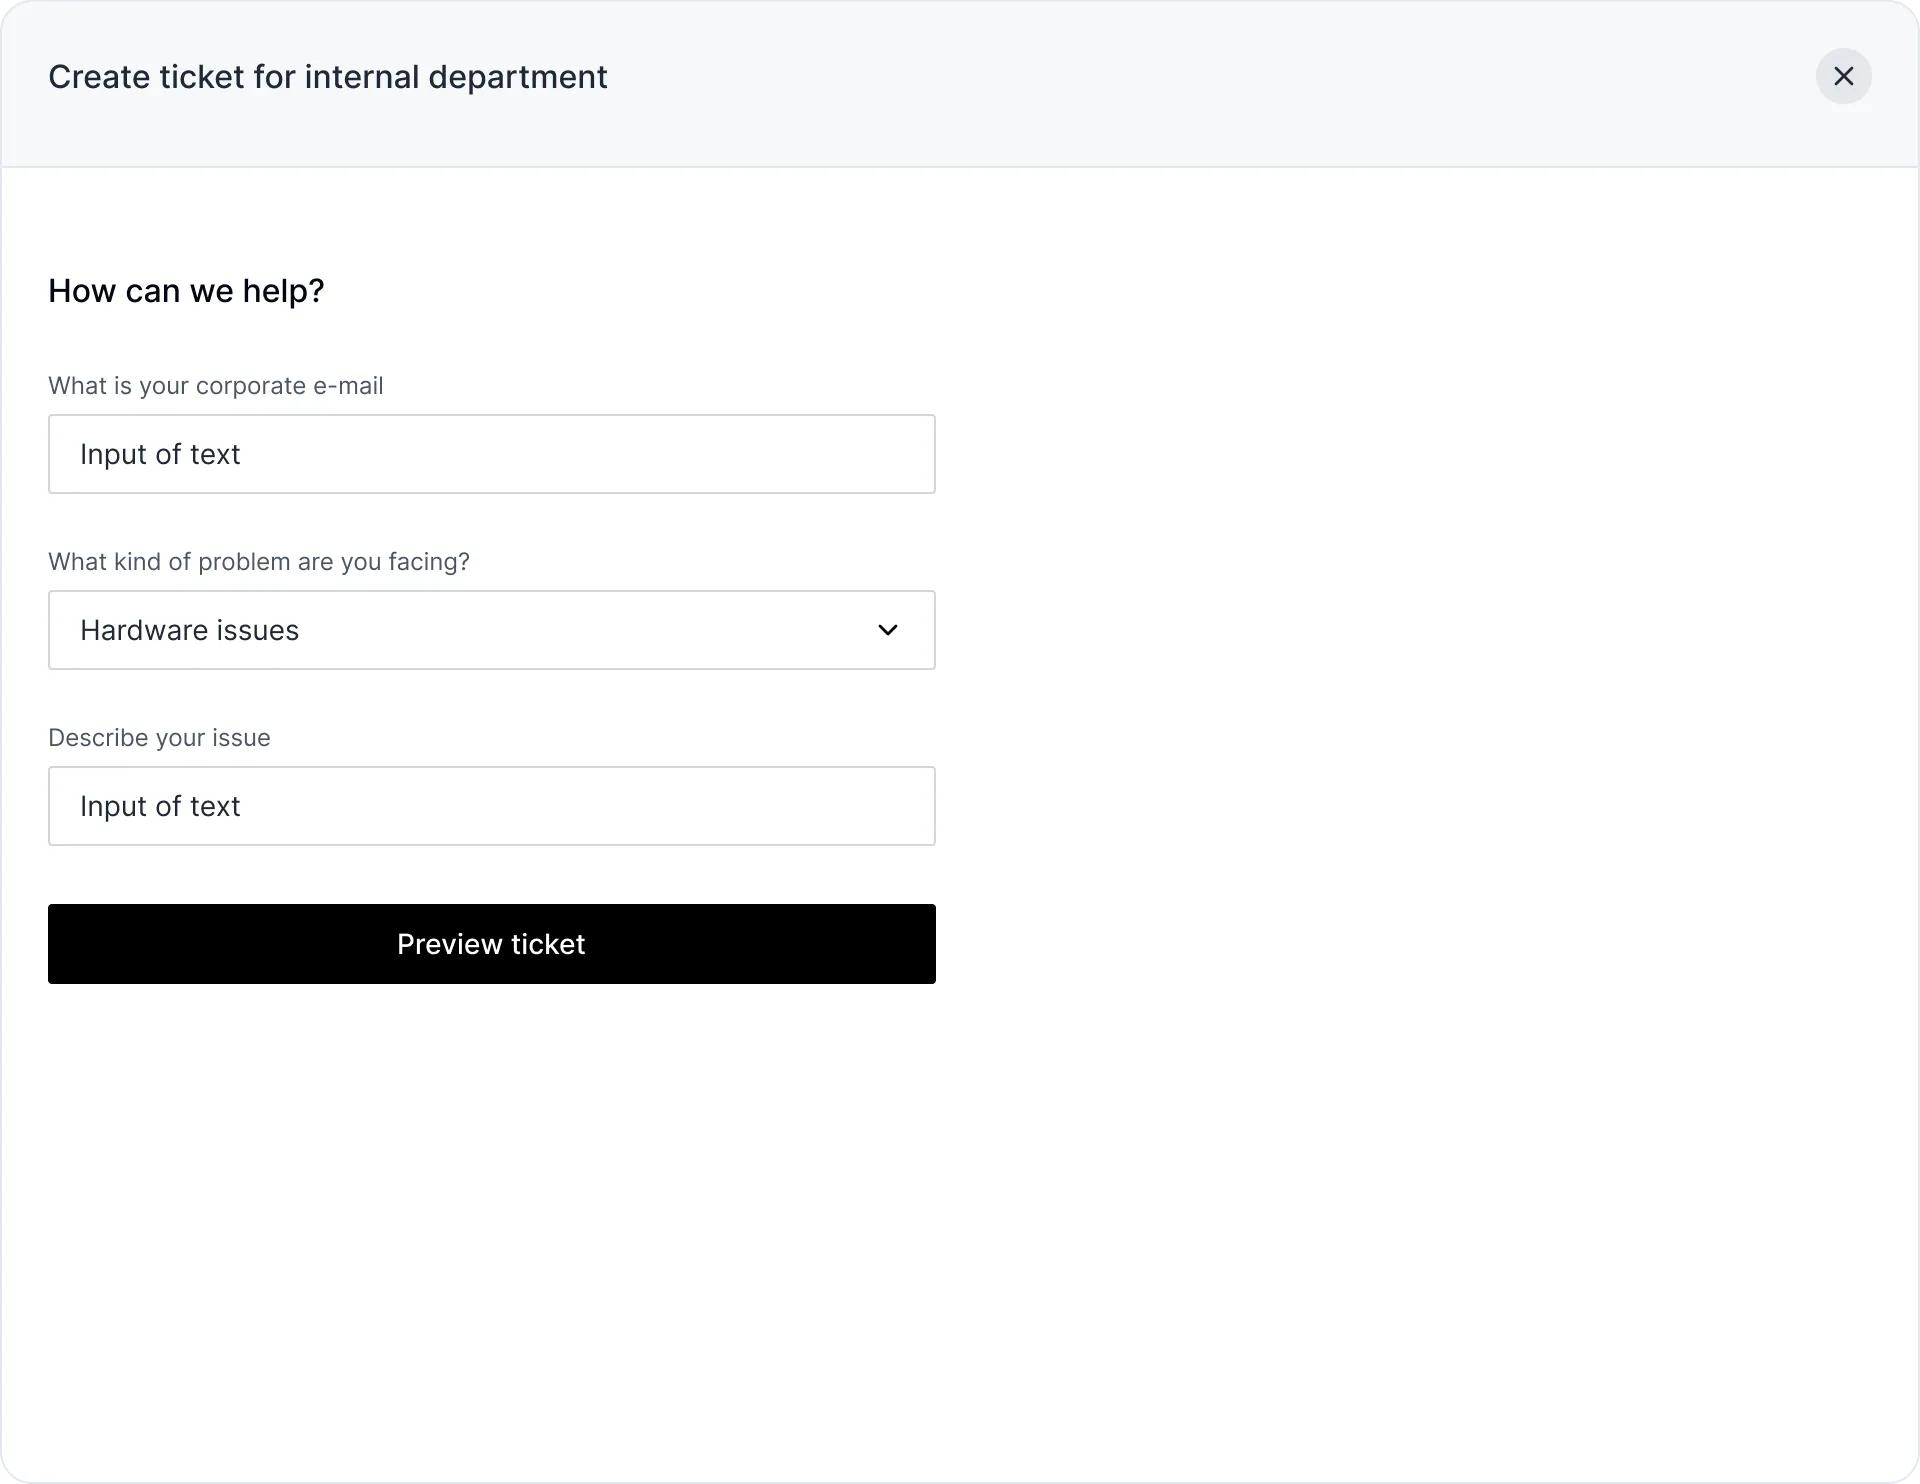
The following component, Input.text, is where things get interesting, though. Let’s take a look at the first page’s body.
body: [ Display.heading('How can we help?'), Input.text({ id: 'email', label: 'What is your corporate email?' }), Input.select({ id: 'problem', label: 'What kind of problem are you facing?', options: [ { label: 'Hardware Issues', value: 'hardware' }, { label: 'Permissions issues', value: 'permissions' }, { label: 'Bug Report', value: 'bug' } ] }), Input.text({ id: 'desc', label: 'Please describe the issue in detail' }), Input.button({ label: 'Preview', onClick: Action.buttonize.app.changePage('PreviewPage') })]Input.text is an Input component and therefore can affect our Runtime State.
This is dictated by the id property, which specifies what the name of the variable in the Runtime State that contains
the value of our Input.text is. In our case, the name of that variable is email.
Just by looking at this page, though, it’s not immediately obvious what all this means. Let’s take a look at the beginning of the second page to make things more clear. (Don’t worry! We’ll cover changing pages in a Buttonize app in just a bit.)
body: [ Display.heading('Is the following info correct?'), Display.text('Email: {{email}}'), Display.text('Problem: {{problem.value}}'), Display.text('Description: {{desc}}') // ... - truncated for brevuty]In the second element, we see Display.text('Email: {{email}}'), which references the variable we were just talking about.
This component renders text on the screen and interpolates {{email}} using the Runtime State, populated by the Input.text
component we discussed above.
Reading on, we can see we in fact reference all the ids from the various Input components on the first page in the second page.
The second page is a preview screen where the user can double check the data they’ve entered before sending it along to IT.
PreviewPage (the second page)
In addition to using values dictated by the Input components from the previous page, though, our second page also makes use
of a couple of Input.button components.
body: [ Display.heading('Is the following info correct?'), Display.text('Email: {{email}}'), Display.text('Problem: {{problem.value}}'), Display.text('Description: {{desc}}'), Display.grid([ { size: 1, body: [ Input.button({ label: 'Go Back', onClick: Action.buttonize.app.changePage('HelpFormPage'), variant: 'secondary' }) ] }, { size: 1, body: [ Input.button({ label: 'Submit', onClick: Action.aws.lambda.invoke( new NodejsFunction(this, 'HelpFormSubmitLambda', { handler: 'handler', entry: path.join(__dirname, `lambdaHandler.ts`), runtime: lambda.Runtime.NODEJS_20_X }), { Payload: { email: '{{email}}', problem: '{{problem.value}}', desc: '{{desc}}' } } ), onClickFinished: Action.buttonize.app.changePage('FinishPage'), variant: 'primary' }) ] } ])]These components specify actions. Notice we have two:
Action.buttonize.app.changePageAction.aws.lambda.invoke
The first is an action internal to Buttonize, hence it being under the Action.buttonize namespace, and it simply changes the active
page of the Buttonize app rendered on the page. In our case, clicking the Go back button simply takes us back to the first page. Why’s that?
Because “HelpFormPage” is passed as the argument, and if you go back to our high level view of the app and its pages above, you’ll see the first
page is named “HelpFormPage”.
The second action interacts with AWS, hence it being under the Action.aws namespace, and as you can probably guess, it invokes a lambda!
Input.button({ label: 'Submit', onClick: Action.aws.lambda.invoke( new NodejsFunction(this, 'HelpFormSubmitLambda', { handler: 'handler', entry: path.join(__dirname, `lambdaHandler.ts`), runtime: lambda.Runtime.NODEJS_20_X }), { Payload: { email: '{{email}}', problem: '{{problem.value}}', desc: '{{desc}}' } } ), onClickFinished: Action.buttonize.app.changePage('FinishPage'), variant: 'primary'})Notice that Runtime State values aren’t just used for display purposes. They’re referenced within the payload with which we invoke the lambda so that our lambda will have access to the values the user punched in.
import { Handler } from 'aws-lambda'
export const handler: Handler = async (event, context) => {  // here you can send the data collected from your buttonize app to a ticketing system,  // or send an email to your support team  console.log(event.email)  console.log(event.problem)  console.log(event.desc)
  return { success: true }}
It’s important to note that Buttonize does not provision the lambda for you! The Action.aws.lambda.invoke action takes a CDK
construct referencing some lambda you’ve created yourself. This way, your Buttonize app can drop right into your CDK stack and play nice
with the rest of your CloudFormation resources. You can do whatever else you want with this lambda within the same stack: hook it up to S3
events, control its IAM permissions, etc. Using Buttonize will not get in the way.
The last thing to note is the onClickFinished property, which simply changes the page to our third and final page after the lambda returns.
If you’d like more info on the Input.button component, please see the docs.
FinishPage (the third page)
There’s not much to this one. It exists solely to give feedback to the user, but the flow could go on! We’ll end our guide here, though, as we’ve covered all the concepts employed within this example.
body: [ Display.heading('Thanks for reaching out!'), Display.text('One of our support team members will contact you shortly')]If you wanted, you could also use variables from the Runtime State on this page as well.
Wrapping Up
That’s about it for this example app. The only other thing worth noting is our use of Display.grid in order to control our layout,
but you can read more about that here.
Hopefully you found this example useful and with it, you’ll build something to make your IT department’s lives easier!